This section will guide you through your first scan with NavLive, from starting the scanner to reviewing your results.
Projects & Scans
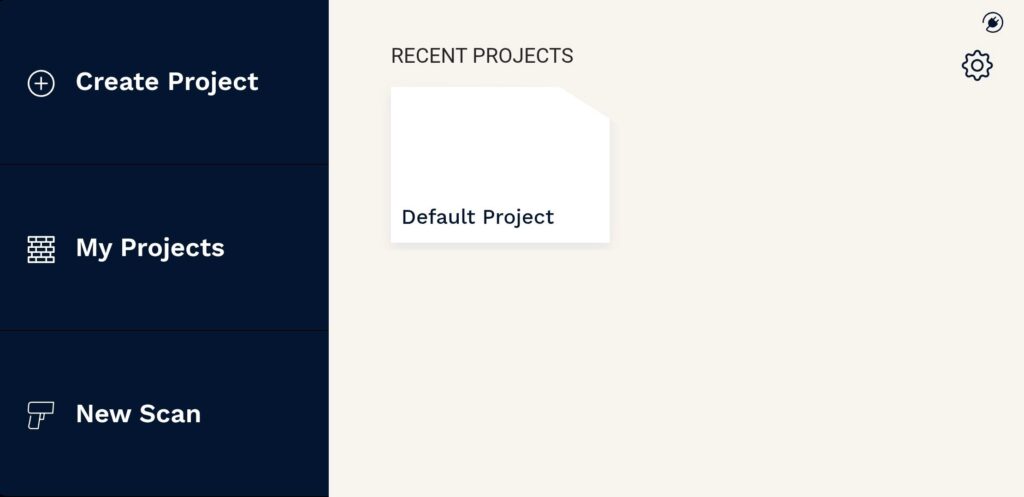
All scans are saved within Projects. When you create your account, a “Default Project” is automatically created for you. You can use this, or create new ones to help organise your scans. (See Working with Projects for more.)
Starting a New Scan
You can begin a scan either from the Home screen or within any Project screen.
1. Tap New Scan from either:
The left-hand menu on the Home screen…
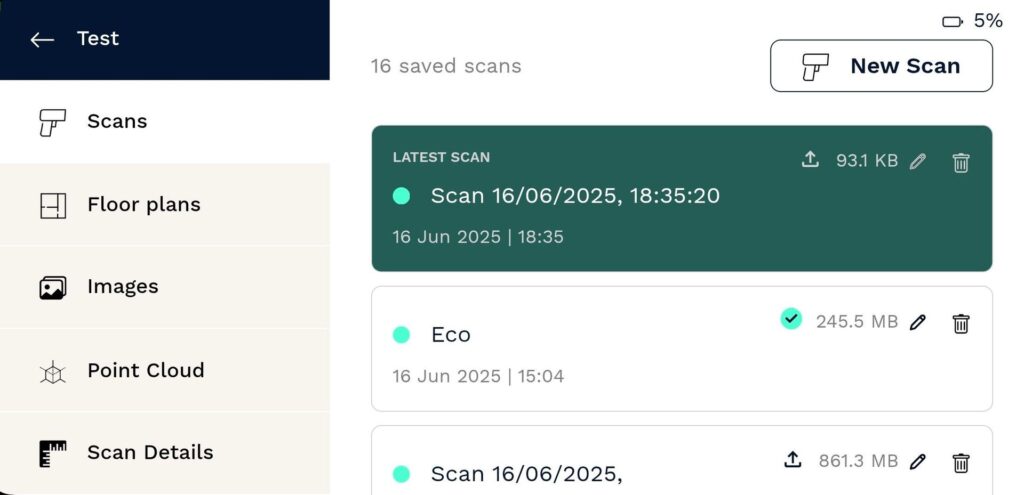
…Or from the top right of the Project screen
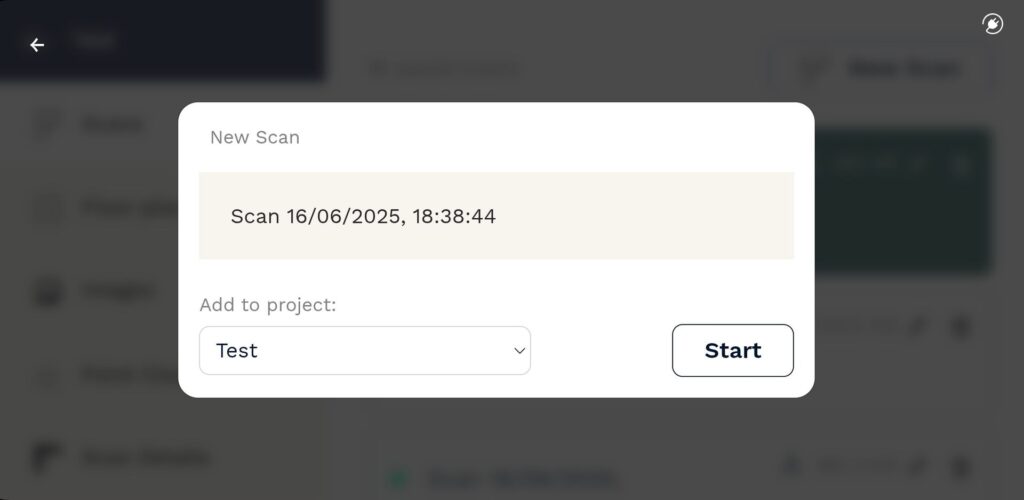
2. In the pop-up, choose the project where you want to save your scan.
3. Name your scan (or stick with the default name, which includes the date and time).
The default name is “Scan [DATE], [TIME]”
4. Tap Start.
The scanner will begin initializing. During this time:
You’ll see the “Scan Starting” screen.
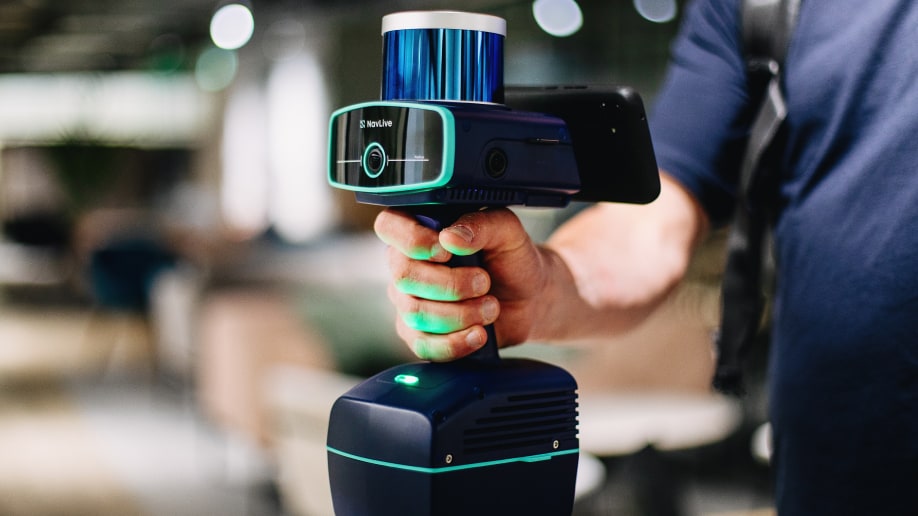
The light on the front of the NavLive Scanner will turn amber.
Keep the scanner as still as possible to help it initialise accurately.
Once the scan is ready:
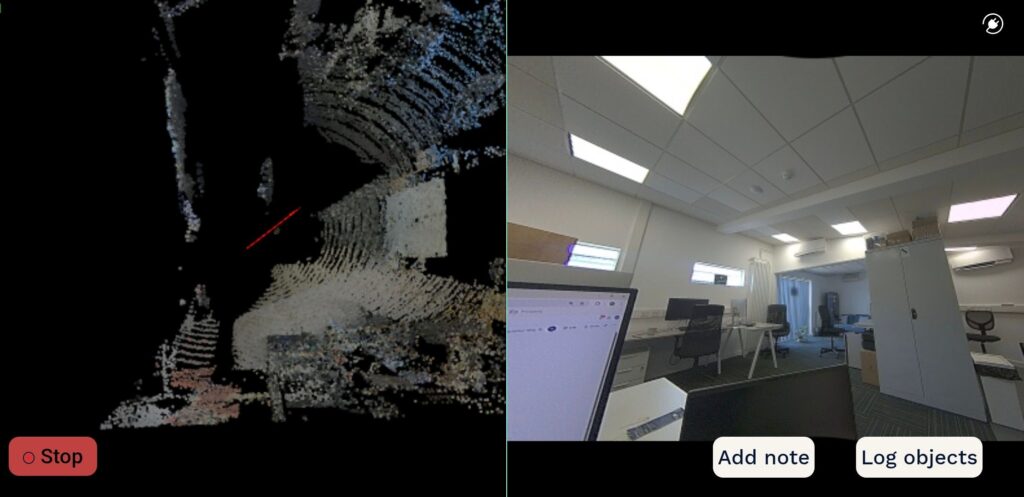
The main scan screen will appear, showing:
A live point cloud view (left side)
A live feed from the front camera (right side)
The scanner’s front light will turn green.
You’re ready to begin walking through the space.
Scanning Tips
Walk at a steady, slow pace.
Always point the scanner in the direction you want to scan.
If you’re moving too quickly, a message will appear asking you to slow down.
Try to stay about 1 metre (3 feet) away from objects as you scan.
If the scanner is too close to walls or furniture on three sides, it will warn you to move back.
Uploading a Scan
Once you’re happy with your scan, you can upload it to your online NavLive Portal. From there, you can export files into other platforms like Revit for further design or BIM development.
Go to the Scan List.
Tap the scan you want to upload.
Tap the Upload icon in the top right corner.
You’ll find a link to your NavLive Portal account in your original setup documents. (See Working with the Portal for more.)
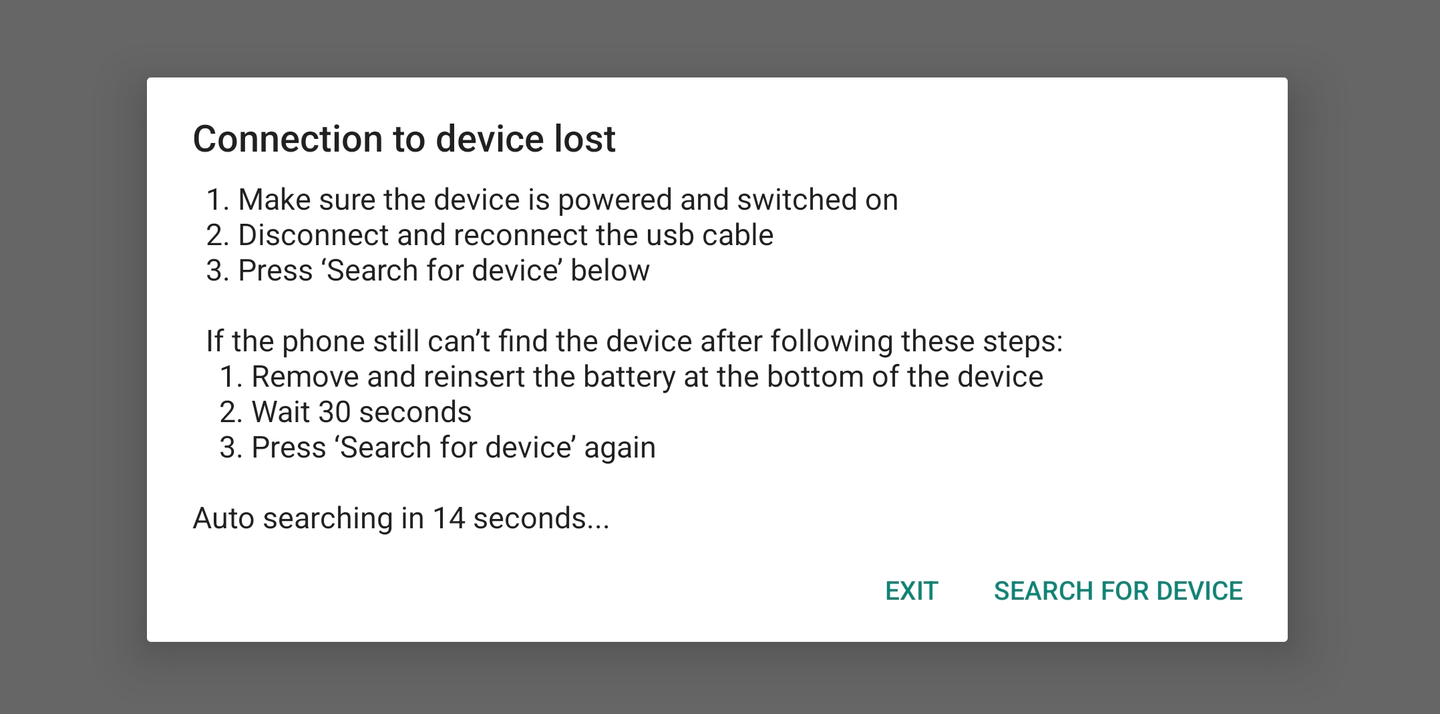
When you turn on the phone that ships with your NavLive Scanner, it will automatically begin searching for your scanner.
While it’s connecting, you’ll see a connection screen with a countdown timer and some quick troubleshooting tips. This screen will stay visible until the NavLive Scanner and phone are successfully connected.
Once connected, you’re ready to assemble the NavLive Scanner, attach the phone, and begin scanning.
For full setup instructions, including assembly and connection steps, see our Setup Guide.
Starting a scan is simple:
Tap New Scan from the left-hand side of the Home screen, or tap the + icon at the top right of the Scans screen within a project.
If you’re starting from the Home screen, you’ll be prompted to select an existing project or create a new one.
Once your project is selected:
Tap Start to begin the scan.
For best results, hold the NavLive Scanner steady while the scan initialises.
You’ll know the scan has started when:
The right side of the screen shows the live camera view from the front-facing camera.
The left side begins to show a 3D point cloud — a live visualisation of the space you’re capturing, built from thousands of sample points.
Now, simply walk through the space, keeping the NavLive Scanner pointed toward the areas you want to capture. Watch the point cloud build in real time to track your coverage.
When you’re finished:
Tap Stop at the bottom left of the screen.
Your scan will process automatically (this may take a few minutes depending on its size), then appear in the Scan List for your project.
Once your scan has been saved, you can view it in the Scans List for the project it belongs to. This list includes all scans associated with that project, with the most recent shown at the top.
To upload your scan to the NavLive Portal for viewing and exporting:
Tap the Upload icon on the scan tile.
After completing a scan, you can upload it to your NavLive Portal directly from the phone interface. Just tap the Upload icon next to the scan you want to send.
Once the scan is uploaded, log in to your Portal to export the data in a variety of formats—ready for use in your design, documentation, or BIM workflows.
After you’ve uploaded your scan to the NavLive Portal, you can export your data in several industry-standard formats:
2D Drawings: Export AI-generated floor plans as .dxf or .pdf files
3D Point Clouds: Export as .las or .pcd files
Once exported, you can open and edit these files using your preferred design software—such as AutoCAD, BricsCAD, SketchUp, or DraftSight. The exported data includes AI-generated floor plans, plan and elevation slices, and the full 3D point cloud.
Need assistance? There are also service providers who can help create or refine plans for you. To learn more, email us at customersupport@navlive.ai.
As you scan, the NavLive Scanner captures images automatically from the three high-resolution cameras (front, left, and right) every 2 meters or approximately every 25 degrees rotation. These images are then available for review in the Images and Route View sections of the output.
To upload your scan output, the NavLive Scanner needs to be connected to a data network.
You have two options:
Connect to WiFi: Open the phone’s WiFi settings, select your preferred network, and then return to the NavLive app.
Use mobile data: If WiFi isn’t available, you can insert a data-enabled SIM card into the phone. Then use the phone’s system settings to connect to your mobile service provider’s network.
In a controlled environment, the NavLive Scanner can achieve measurement accuracy between 1cm and 2cm. Actual accuracy may vary depending on environmental conditions and scanning technique.
A point cloud is a 3D representation of the space you’ve scanned using the NavLive Scanner. It consists of thousands or even millions of individual points, each captured as the scanner samples its surroundings. The colour of each point is derived from the images taken during the scan, providing a realistic view of the environment.
This rich visual output helps you—and your team or clients—understand the space quickly and clearly. You can view the point cloud on your phone immediately after the scan, or upload it to your NavLive Portal where it can be viewed, exported, and shared as .las or .pcd files. These formats are compatible with 3D software packages, allowing you to generate floor plans, elevations, and BIM models.
While scanning with the NavLive Scanner, you can log a window or door by either:
Pulling the trigger on the handle
Or tapping the Log Object button on the bottom right of the Scan screen
This will capture the location and dimensions of the opening, which will be added to your AI Drawings (see Floor Plans for more on this feature).
Yes! You can add a note at any time during a scan by tapping the Add Note button on the Scan screen (bottom left), or by pulling the trigger twice quickly.
Each note is saved with an image and pinned to the exact location it was recorded.
We recommend shutting down your NavLive Scanner as soon as you’ve completed all your scans and uploaded them to the Portal.
There are three ways to shut down the device:
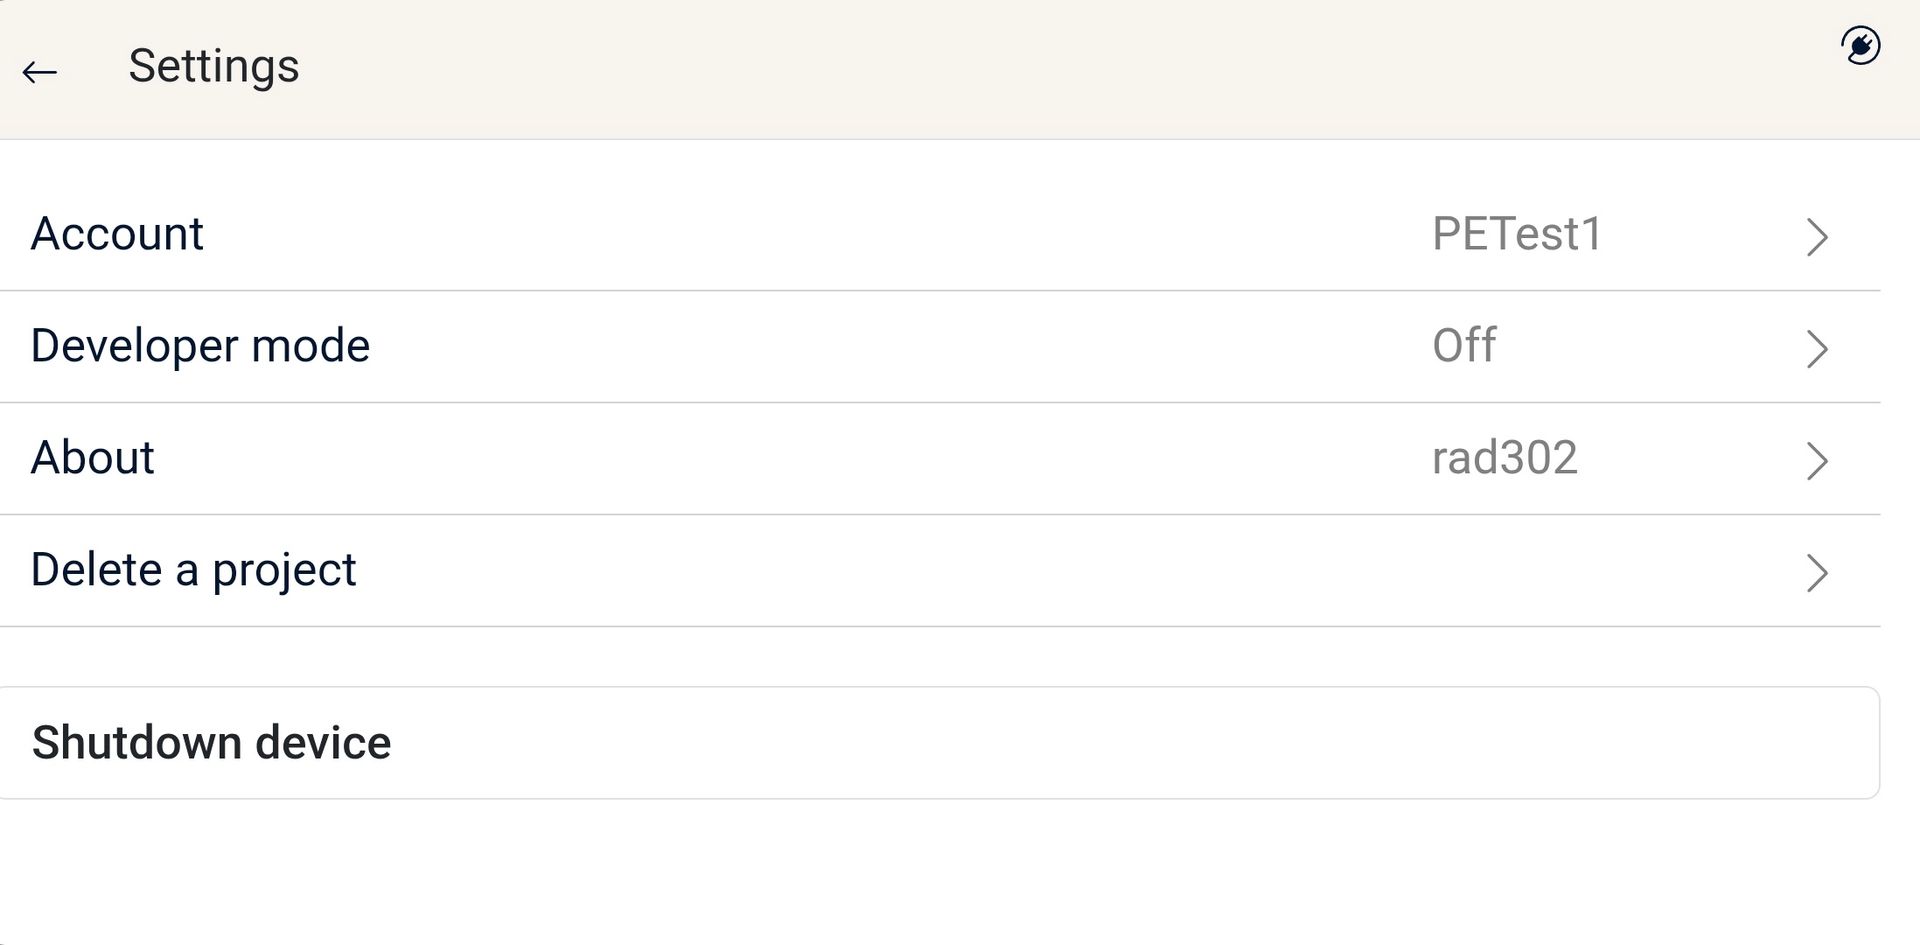
1. Soft Shutdown via the App (Recommended)
Tap the Settings icon at the top left of the Home screen.
Select Shutdown Device from the Settings menu.
2. Soft Shutdown via Power Button
You can also shut the device down using the Power Button on the bottom rear of the scanner:
Press the button once to trigger a shutdown confirmation popup.
Confirm to shut the scanner down.
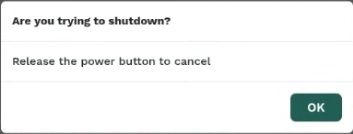
3. Forced Shutdown (Only if Unresponsive)
If the scanner becomes unresponsive, you can perform a hard shutdown:
Press and hold the Power Button for 12 seconds.
Around the 8-second mark, a confirmation popup will appear:
Keep holding to proceed with the shutdown, or release the button to cancel.
After 12 seconds, the scanner will power off completely and can be restarted.
⚠️ Any scans captured before shutdown should be saved. If you have trouble accessing them, contact NavLive Support at customersupport@navlive.ai.
The NavLive Scanner features three high-resolution cameras—positioned on the front, left, and right. Each camera captures images at a resolution of 1456 × 1088 pixels.
You can export your scan outputs from the NavLive Portal in the following formats:
Floor Plans:
• .dxf
• .pdf
3D Point Cloud:
• .las
• .pcd
For optimal scan quality, the NavLive Scanner has a maximum effective range of 60 metres.
The NavLive app is built for Android and may run on other Android phones. However, we currently only support the NavLive app on the phone supplied with your scanner.
Additionally, the app is not available via the Play Store or any public download site. It comes pre-installed and configured on the supplied device.
While it is technically possible to use the phone for general smartphone functions, we do not recommend or support this. The phone is configured specifically for use with the NavLive Scanner, and we do not provide support for any other features, apps, or phone-related issues outside the NavLive system.
The NavLive Scanner generates point cloud data at a resolution of approximately 1 point per centimetre, or around 1 million points per cubic metre. This provides a detailed and accurate 3D representation of the scanned space.
The battery provides approximately 1 hour of scanning time before full depletion. However, we recommend swapping the battery when it reaches 10–20% to avoid interruptions.
A low battery warning appears at 20%, and the device will automatically shut down at 6%.
The current battery level is always shown in the top right corner of the phone screen—unless the NavLive Scanner is connected to mains power via the battery charger, in which case a power icon is shown instead.
Note: This battery icon shown on the top-right of the phone refers to the scanner’s battery, not the phone’s battery.
To replace the battery:
Press the black release button on the side of the NavLive Scanner.
Slide the battery housing forward to expose the battery.
Swivel the two battery retainers upward and outward.
Lift and slide the battery out from the rear of the housing.
Insert the new battery and reverse the steps to secure it in place.
⚠️ Important: Do not remove the battery while the scanner is powered on. This may damage your NavLive Scanner and result in data loss. If this occurs, contact us at customersupport@navlive.ai — we may be able to help recover your data.
Yes — but only under the right conditions.
You can safely hot-swap the battery (replace it while the scanner is powered on) only if:
The supplied charger is connected to the scanner, and
The charger is plugged into a switched-on mains power supply.
This temporary power connection will keep the device running while you swap batteries.
⚠️ Warning: Do not attempt to change the battery without an external power supply connected. Doing so risks damage and potential data loss.
We strongly recommend removing the battery from the NavLive Scanner after powering it down, especially when transporting or storing the device. This helps protect the battery, prevent accidental power-on, and reduce the risk of damage during travel.
If you need help or have any questions, you can reach the NavLive Customer Support team by emailing: 📧 customersupport@navlive.ai
Schedule your NavLive demo
In this initial 15-minute call, we'll:
Gather some quick info about your current surveying workflows.
Answer any questions you have about NavLive.
Schedule an in-person site visit to demo the NavLive scanner at your office.