[FREE DOWNLOAD] How to Get the Best Results with the NavLive Scanner
The NavLive Scanner is designed to work effectively straight out of the box. But like any spatial capture tool, the quality of your results depends heavily on how you move through a space and how you structure a scan.
This guide brings together the most important field tips used by experienced teams, from movement patterns and loop closure to managing long scans, capturing notes, and recovering from tracking loss.
Whether you’re scanning buildings, infrastructure, or complex interiors, these practices will help you capture more reliable data with less rework.
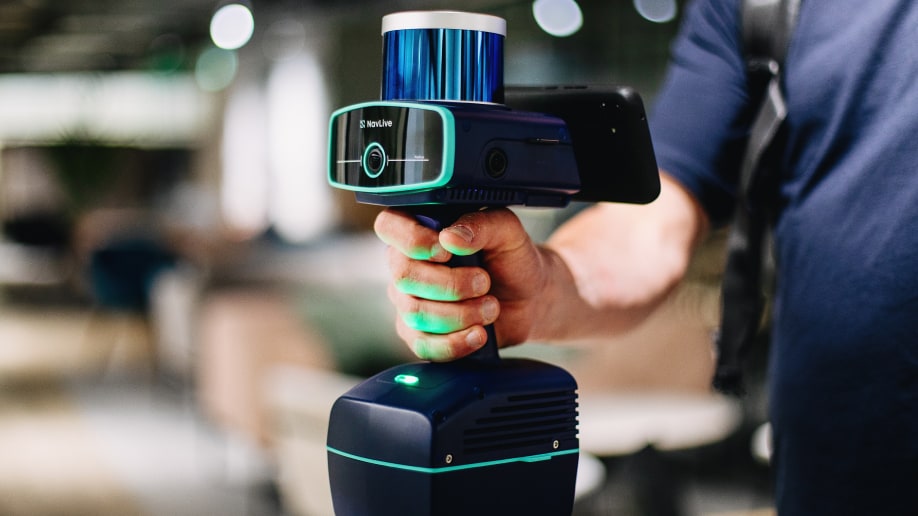
Click on the image above to download our free printable guide for the best scanning tips and tricks with the NavLive Scanner.
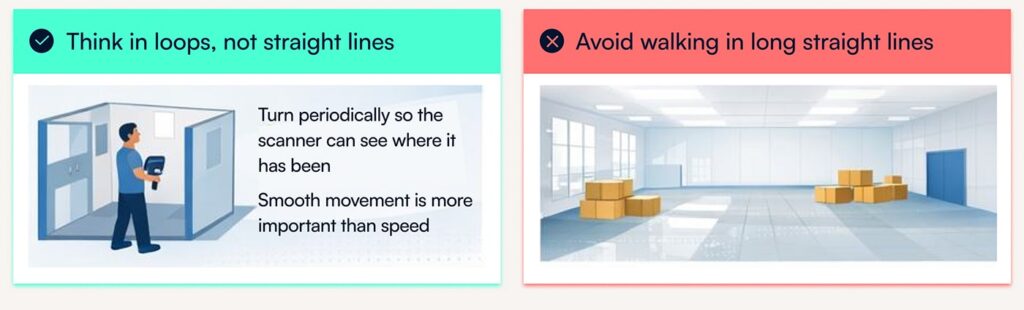
Start with Movement, Not Settings
Good scans begin before you press record.
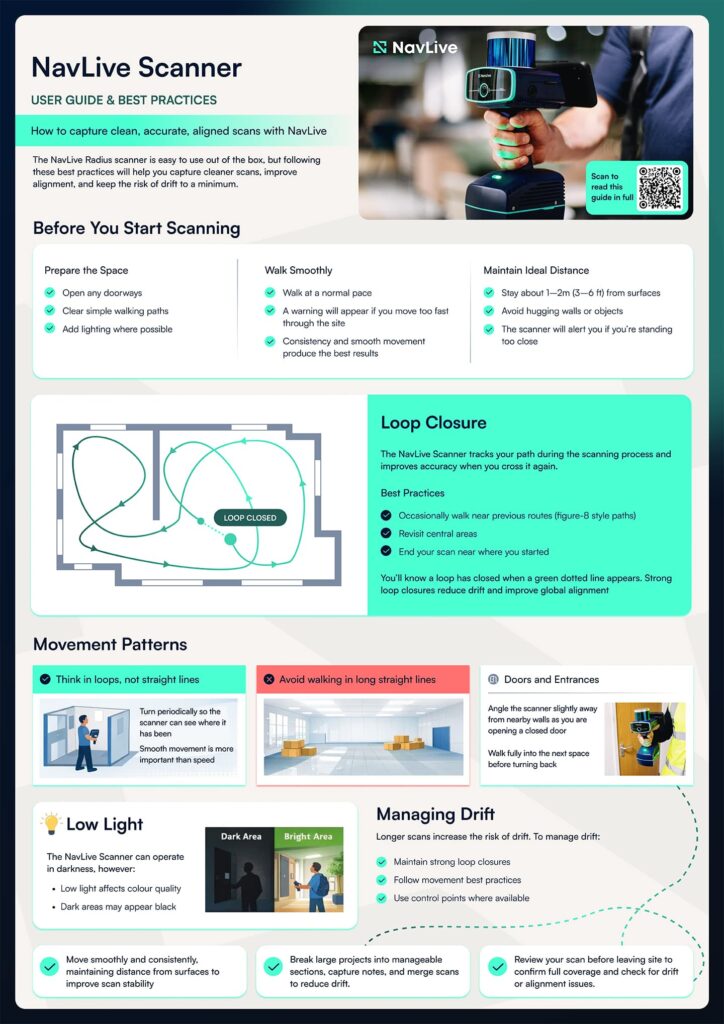
Preparing the space makes it easier to move continuously, which is one of the biggest factors in scan quality. Open as many internal doors as possible so you can walk naturally between rooms without stopping, and clear simple walking paths where needed. Lighting isn’t essential for geometry, but it significantly improves colour output, so turn on lights when available.
Once scanning, aim for a steady, consistent walking pace. The NavLive Scanner will warn you if you move or rotate too quickly, but smooth movement is more important than speed. Sudden turns and stop-start motion make alignment harder.
If you need more detail in a specific area, slow down or briefly pause. This increases point density, although standing still too long can soften edges.
Maintaining the right distance also matters. Staying roughly 1–2 metres from surfaces gives the best balance of coverage and accuracy. Avoid hugging walls or objects. The scanner will alert you if you get too close.
Why Loop Closure Matters
One of the most important concepts in mobile scanning is loop closure.
The NavLive Scanner continuously tracks your path through a space. When you cross your previous route, the system strengthens alignment and reduces drift. You can think of this as stitching your scan together.
In practice, this means scanning in loops rather than straight lines. Walking rough figure-8 patterns, revisiting central areas, and finishing near your starting point all help the model stabilise. When a loop is detected, the scanner indicates it with a green dotted line.

Strong loop closure is one of the simplest ways to improve overall accuracy, especially in larger environments.
Scanning Different Types of Spaces
Every environment presents different challenges, but the same principles apply.
Confined spaces
Small enclosed rooms can reduce tracking context. Avoid staying in tight spaces too long and periodically turn the scanner so it can “see” where it has been. Moving back into open areas helps re-anchor alignment.
Large open areas
Very plain spaces, such as empty warehouses, large halls, and long blank walls, provide few visual features for positioning. If possible, introduce temporary reference objects such as boxes or furniture. Vary your walking path and create overlaps rather than scanning in one straight pass.
Corridors, stairs and multi-level environments
Long corridors are a common source of drift for all LiDAR scanners. Walk partway, turn around occasionally, and create overlap with previous coverage. On staircases, especially switchbacks, turning at landings helps connect floors accurately and improves vertical alignment.
Capturing Doors, Entrances and Hidden Surfaces
Doorways are natural alignment stress points, so intentional movement here makes a difference.
When passing through a doorway, angle the scanner slightly away from nearby walls, walk fully into the next space, and then turn back to capture both sides. Periodically rotating the scanner behind you helps capture surfaces hidden during forward motion.
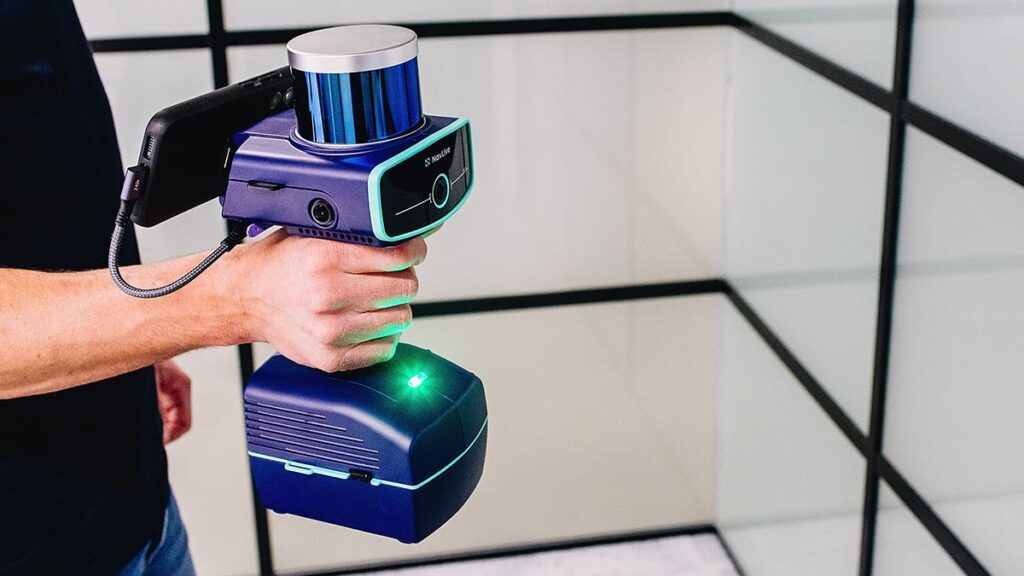
The NavLive Scanner can be rotated freely (even upside down) to capture behind objects, underneath equipment, or other difficult areas. Using that flexibility improves completeness without needing separate scans.
For floor plan clarity, keep doors and windows closed when capturing geometry. If you need to show door swing direction, scan behind the open door intentionally.
Overhead Capture: Ceilings, MEP and RCP
Overhead detail often gets missed during standard walking scans. Tilting the scanner upward while moving slowly ensures ceilings, services, and other high elements are captured clearly.
The wide field of view means floors and surrounding context continue to be recorded even when the scanner is angled upward. Periodically turning while doing this helps maintain alignment.
Lighting and Colour Quality
The NavLive Scanner can capture geometry in darkness, but lighting directly affects colourisation.

Low-light areas may appear black in the final output. If colour is important, add temporary lighting, open blinds, or switch on available fixtures.
Even modest lighting improvements can significantly enhance visual results.
Capturing Notes and Detail Images
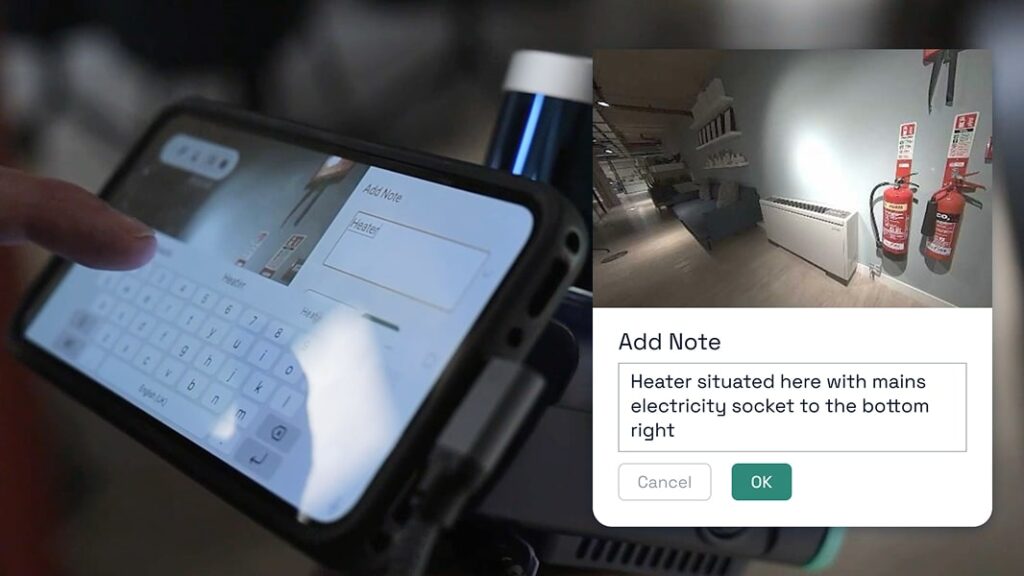
Field documentation is part of scanning, not something that happens later.
At any time during a scan, you can capture individual images and attach notes by tapping the Note button or double-pulling the trigger. These markers are useful for flagging issues, recording measurements, highlighting areas of interest, or documenting changes.
Teams often use notes as anchors for QA, coordination, or handover workflows.
To learn how to add Notes in NavLive, read our user guide now.
Managing Long Scans
The NavLive scanner provides 1TB of onboard storage, enabling large volumes of scan data to be captured across multiple projects without frequent offloading.
Each battery delivers approximately one hour of continuous scanning, and when the device is connected to mains power, batteries can be hot-swapped without interrupting capture.
However, as with any LiDAR scanner, longer scans increase the likelihood of drift. The best way to manage this is through strong loop closure and consistent movement.
For very large projects, many teams work in structured segments, for example, capturing 20-minute sections and merging them later. Tools such as CloudCompare and Autodesk ReCap Pro support this workflow.
Using Control Points within a scan can also help address drift in complex environments. To learn more about Control Points in NavLive, click here.
Moving Objects in the Scene
People, vehicles, or temporary movement won’t usually break tracking. These elements may appear in multiple positions in the dataset, but they don’t prevent the scan from completing.
The bigger challenge is environments with constant small motion, for example, blowing foliage, which provides unstable reference features. Where possible, avoid scanning heavily dynamic areas or create stronger loops around them.
What to Do If Tracking Fails
A scan failure message doesn’t mean your work is lost. All recorded data up to that point is saved.
In most cases, recovery is straightforward:
- Step back a few metres into previously scanned space
- Create overlap with existing coverage
- Start a new scan
You can merge datasets later using CloudCompare, ReCap Pro, or other processing tools.
The Big Principle: Think in Loops
Across all environments, the same idea applies: scan in loops, not lines.
Smooth movement, consistent distance from surfaces, periodic turning, and revisiting key areas create stronger datasets. Ending near where you started is one of the simplest ways to improve alignment.
The NavLive Scanner is built to support natural movement. When you move with the system rather than against it, results improve quickly.
Quick Field Checklist
Before scanning:
- Open doors and clear paths
- In darker areas, add lighting where possible
During scanning:
- Move smoothly at a steady pace
- Stay 1–2 metres from surfaces
- Create loops and overlaps
- Turn periodically
After scanning:
- End near your starting point
- Review alignment
- Merge sections if needed
High-quality scanning isn’t about complicated settings. It’s about predictable movement, good overlap, and understanding how the system builds context.
Follow these practices consistently and you’ll see cleaner geometry, stronger alignment, and more reliable deliverables across projects.